
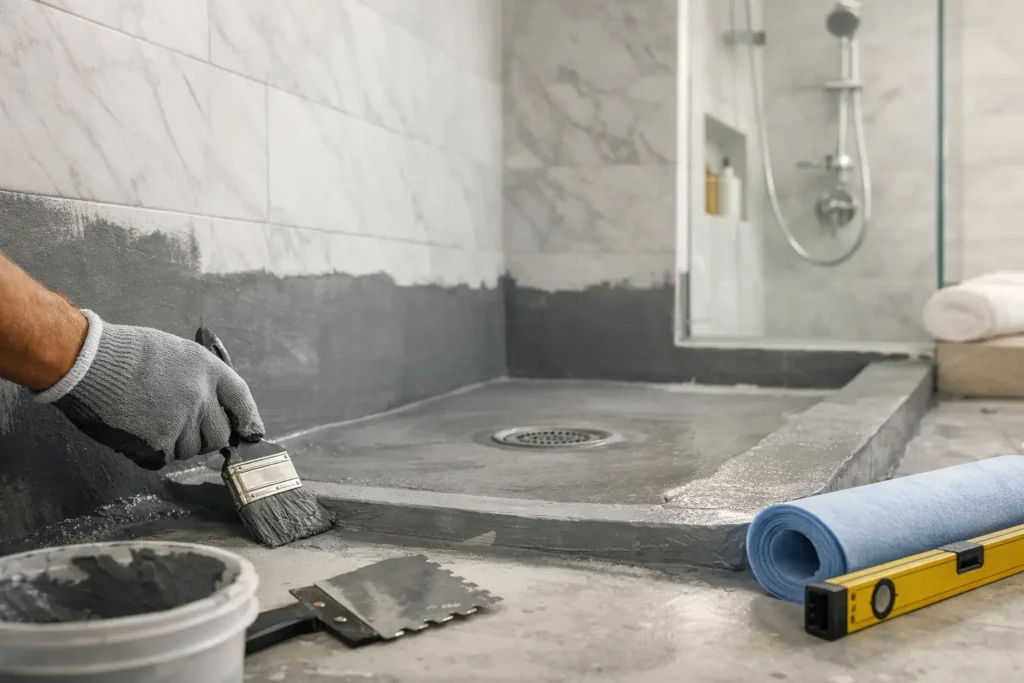
A beautiful bathroom can be undermined by one invisible failure behind a shower wall or beneath a tiled floor. This guide to bathroom waterproofing explains how a properly planned system protects your investment, prevents disruptive leaks and gives your finished space the lasting quality it deserves.
Why bathroom waterproofing deserves careful planning
Tiles, grout and silicone may look watertight, but none should be treated as the primary defence against moisture. Grout is porous, silicone has a limited service life, and tiny gaps can develop where different surfaces meet. Water can then reach the plasterboard, timber floor structure or adjoining room before there is any obvious sign of a problem.
The consequences are rarely confined to one loose tile. Moisture can lead to stained ceilings, swollen timber, mould growth, damaged finishes and, in more serious cases, repairs to rooms below. In London homes, where bathrooms are often positioned above living spaces and older properties may have timber floors, getting the hidden layers right is particularly valuable.
Waterproofing is therefore not simply a tiling task. It is a coordinated stage of the renovation, completed after the room has been prepared and before the final finishes conceal the work. A high-quality result depends on the right materials, correct sequencing and close attention to junctions.
What waterproofing means in a bathroom renovation
Bathroom waterproofing, sometimes called tanking, is the installation of a continuous water-resistant barrier beneath the visible finish. Depending on the design, this may be a liquid-applied membrane, a sheet membrane, waterproof boards with compatible sealing components, or a specified combination of these products.
The word continuous matters. A good system does not stop at the middle of a wall or rely on a few generous beads of sealant. It includes overlaps, corners, pipe penetrations, drains and changes in material. Every part must work together as one manufacturer-approved system.
The level of protection needed depends on how the room will be used. A family bathroom with a frequently used over-bath shower needs a different approach from a lightly used cloakroom with a basin and WC. A level-access shower requires especially careful floor falls, drainage and sealing because water is intentionally directed across the floor.
Wet zones need the strongest protection
The highest-risk areas are usually the shower enclosure or bath-shower walls, the floor in and around a walk-in shower, and the junctions between walls and floors. Walls behind a basin may also benefit from protection where daily splashing is likely, particularly if the finish is tiled.
For a shower, the waterproofing layer should generally extend well beyond the immediate spray area rather than stopping precisely at the edge of a screen. This is sensible protection against splashes, cleaning and the occasional enthusiastic bath time. The exact coverage should be agreed at the design and specification stage, based on the enclosure, shower type and substrate.
Start with a stable, well-prepared substrate
Even the best membrane cannot correct poor preparation. Before waterproofing begins, the existing surfaces need to be assessed for movement, damage, flatness and suitability. Loose plaster, deteriorated boards, uneven screed and flexing floors all need resolving first.
For tiled shower walls, a suitable tile backer board is often a dependable choice. It provides a stable surface in wet areas, but it should not automatically be assumed to be waterproof at board joints, screw fixings or penetrations. Those details still need compatible tapes, collars and sealants as part of the full system.
Floors require equal care. On timber structures, the floor must be sufficiently rigid for the chosen tile and finish. Excess movement can crack grout and tiles, creating a route for water while also damaging the waterproofing layer below. Where levelling is required, the installer should use products appropriate for the substrate and allow proper curing time before the next stage.
This preparation is one reason a professionally managed bathroom renovation feels more controlled. Plumbing positions, electrical work, floor build-up, ventilation, wall boarding and waterproofing must be planned in the right order. Rushing any one of them usually creates avoidable rework later.
Choosing the right waterproofing system
There is no single product that suits every bathroom. The best choice is one that matches the construction, final finish and the demands of the space.
Liquid membranes are applied with a brush or roller and are commonly used on walls and floors. They can be practical around awkward shapes and pipework, provided the correct coverage and drying times are observed. Thin or uneven application can compromise the system, so this is not a stage for guesswork.
Sheet membranes provide a consistent barrier thickness and can be an excellent option for wet rooms and walk-in showers. They demand accurate cutting, firm bonding and carefully sealed overlaps. Waterproof tile backer systems can also be effective where their boards, tapes, washers and sealing accessories are installed exactly as specified.
It is tempting to mix products from different brands when a particular tape or adhesive seems convenient. That can create uncertainty over compatibility and warranties. A better approach is to use a complete system designed to work together, including the membrane, joint tape, corner pieces, pipe collars and drain connection.
Drainage and falls are part of the waterproofing strategy
A membrane protects the structure, but it does not replace good drainage. In a walk-in shower, the floor must fall consistently towards the drain so water does not sit in corners or run into the wider room. The drain itself must be correctly integrated with the waterproof layer – a weak connection here can allow water to travel beneath the floor finish.
This is where the design of a low-profile shower tray and a fully tiled wet-room floor can differ. A tray has factory-formed falls and a defined interface with the surrounding wall system. A wet-room floor offers a refined, open look, but it needs more detailed setting-out and a carefully built floor gradient. The right choice depends on the room, desired aesthetic, accessibility needs and budget.
The installation sequence that protects the finish
Waterproofing performs best when it follows a disciplined sequence rather than being treated as a quick step before tiling. Once walls and floors are stable, clean and dry, the installer primes surfaces where required by the chosen system. Internal corners, board joints, wall-to-floor junctions and cracks are then reinforced with compatible tape or fabric.
The membrane is applied over the prepared area, with particular attention to corners and pipe penetrations. Pipe collars are valuable because pipes move slightly with use and temperature changes, placing stress on the surrounding finish. Around showers, niches and valves, small details make a substantial difference to long-term performance.
After the specified drying or curing time, the waterproofed area should be inspected before tiles are fixed. On suitable floors, a controlled flood test may be used to check for leakage before the final finish is installed. This is far easier and less costly than diagnosing a concealed problem after the bathroom is complete.
Only then should tiling begin, using adhesives and grout suited to the tile type and substrate. The final perimeter joints and changes of plane should be finished with sanitary-grade silicone rather than rigid grout. Silicone is a finishing seal, not the whole waterproofing strategy, but it provides an essential flexible surface joint.
Common shortcuts that cause expensive problems
The most damaging bathroom failures often begin with seemingly minor shortcuts. Tiling directly onto unsuitable plasterboard in a shower, waterproofing only the most obvious splash area, or leaving unsealed pipe holes can all create weak points. So can applying a membrane over damp, dusty or unstable surfaces.
Another common mistake is to assume that a leak must come from the shower tray or visible sealant. Water may be entering through a failed wall junction, poorly sealed niche or inadequate drain connection, then appearing some distance away. Finding the true source can require removing tiles and finishes, which is why prevention offers far better value.
Ventilation should also be considered alongside waterproofing. An effective extractor fan, correctly sized for the room and used consistently, helps control condensation and supports the life of painted surfaces, sealants and cabinetry. It will not replace a waterproof membrane in a wet zone, but both measures protect the bathroom from different forms of moisture.
Planning waterproofing into your budget and timeline
A properly specified waterproofing system is a modest part of the overall bathroom budget when compared with the cost of repairing water damage after completion. It should be clearly included in the scope of works rather than appearing as an afterthought once the room has been stripped out.
Ask how wet zones will be defined, what system will be used, how joints and penetrations will be sealed, and whether the floor construction needs strengthening or levelling. You should also understand the drying times between stages, as membranes, adhesives and silicone cannot be hurried without risking the quality of the result.
At ARC Global Engineering, this level of planning is built into a managed renovation process, so the design vision, technical details and finishing stages remain aligned from the outset. The goal is not merely a bathroom that photographs well on handover day, but one that continues to support comfortable daily living for years to come.
Choose materials and fittings you enjoy, but give equal attention to the layers you will never see. A bathroom built on sound preparation and careful waterproofing offers the quiet confidence that every premium renovation should provide.